Table of Contents
Introduction
This tutorial will walk you through starting your own project that includes a server module and a client node (application) module in Android Studio. To get started, download the Berkeley Telemonitoring source code and extract it. We refer to the root directory as the directory that includes the directories lib and examples. In Android Studio, choose the option to open an existing project and point it to the root directory. Once this is done, the project structure should look as depicted in Figure 1.
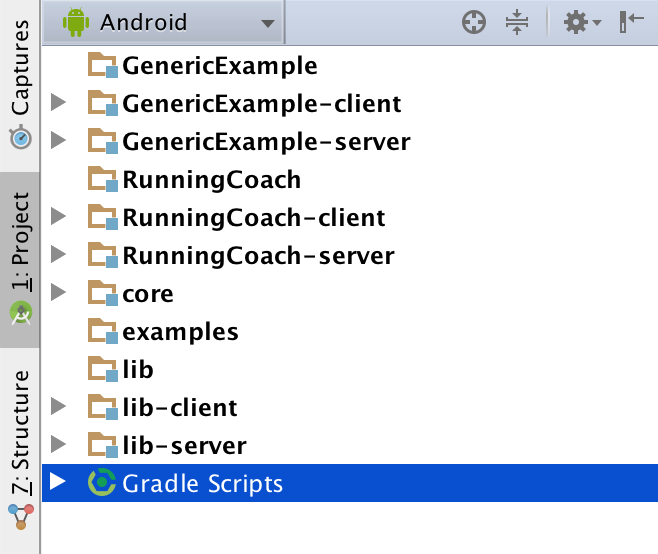
The modules GenericExample-client, GenericExample-server, RunningCoach-client and RunningCoach-server are example modules that you can browse for further learning.
Creating a server module
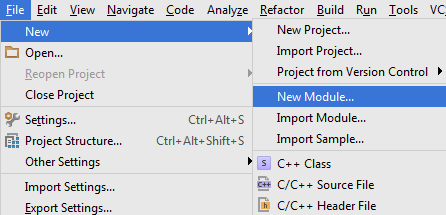
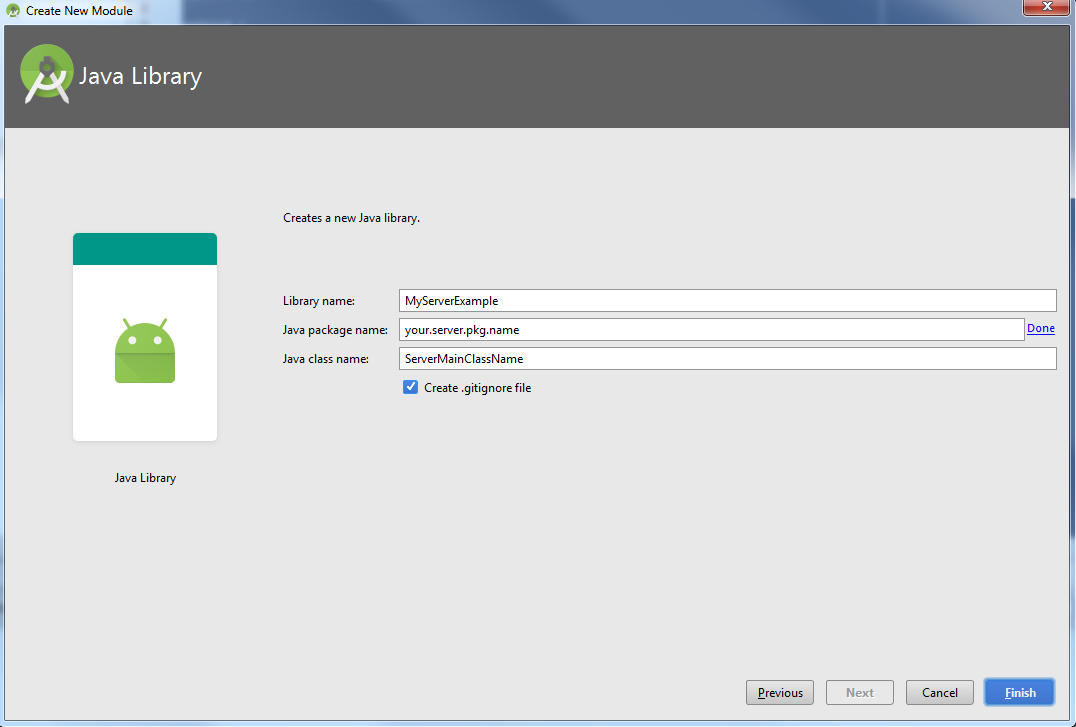
To create a server module, select New Module from the File -> New menu as depicted in Figure 2. From the Create New Module dialog, select Java Library (Figure 3).

The server build.gradle file should look like this:
apply plugin: 'java'
sourceCompatibility = 1.6
targetCompatibility = 1.6

description = 'This is the example telemonitoring server'
version = '0.0.1'
group = 'RunningExample'

jar {
    manifest {
        attributes 'Main-Class': 'edu.berkeley.telemonitoring.runningexample.server.ServerMain'
    }

    from {
        configurations.compile.collect { it.isDirectory() ? it : zipTree(it) }
    }
}


dependencies {
    compile fileTree(include: ['*.jar'], dir: 'libs')
    compile project(':lib:server')
    compile project(':lib:core')
    testCompile 'junit:junit:4.12'
}
The highlighted lines can be edited to reflect your specific project. For the purposes of the running example in this tutorial, we will use the package nameedu.berkeley.telemonitoring.runningexample.serverfor the server module.
Creating a client node module
To create a client module, select New Module from the File -> New menu as depicted in Figure 2. From the Create New Module dialog, select Phone & Tablet Module (Figure 5).
The client node build.gradle
apply plugin: 'com.android.application'

description = 'This is the example telemonitoring client'
version = '0.0.1'
group = 'RunningExample'

android {
    compileSdkVersion 23
    buildToolsVersion "23.0.2"

    defaultConfig {
        applicationId "edu.berkeley.telemonitoring.runningexample.client"
        minSdkVersion 11
        targetSdkVersion 23
        versionCode 1
        versionName "1.0"
    }

    compileOptions {
        sourceCompatibility JavaVersion.VERSION_1_7
        targetCompatibility JavaVersion.VERSION_1_7
    }

    buildTypes {
        release {
            minifyEnabled false
            proguardFiles getDefaultProguardFile('proguard-android.txt'), 'proguard-rules.pro'
        }
    }
    packagingOptions {
        exclude 'META-INF/LICENSE.txt'
        exclude 'META-INF/NOTICE.txt'
        exclude 'META-INF/LICENSE'
        exclude 'META-INF/NOTICE'
    }
}

dependencies {
    compile fileTree(include: ['*.jar'], dir: 'libs')
    testCompile 'junit:junit:4.12'
    compile project(':lib:client')
    compile project(':lib:core')
    compile 'com.android.support:appcompat-v7:23.1.1'
    compile 'com.android.support:design:23.1.1'
    compile 'com.android.support:support-v4:23.1.1'
}
The highlighted lines can be edited to reflect your specific project. For the purposes of the running example in this tutorial, we will use the package nameedu.berkeley.telemonitoring.runningexample.clientfor the client module. The lines 30-35 are added in order to prevent conflicts in the resulting application package (.apk file) as a result of files with the same name coming from different dependencies and libraries. We are working on a better solution that would include all these files from the different libraries without any conflicts.