Table of Contents
What Is a Survey?
A Survey is a Java class that represents a survey with questions and answers. Questions are in text format while answers can be inputted via text, radio buttons, or check lists.
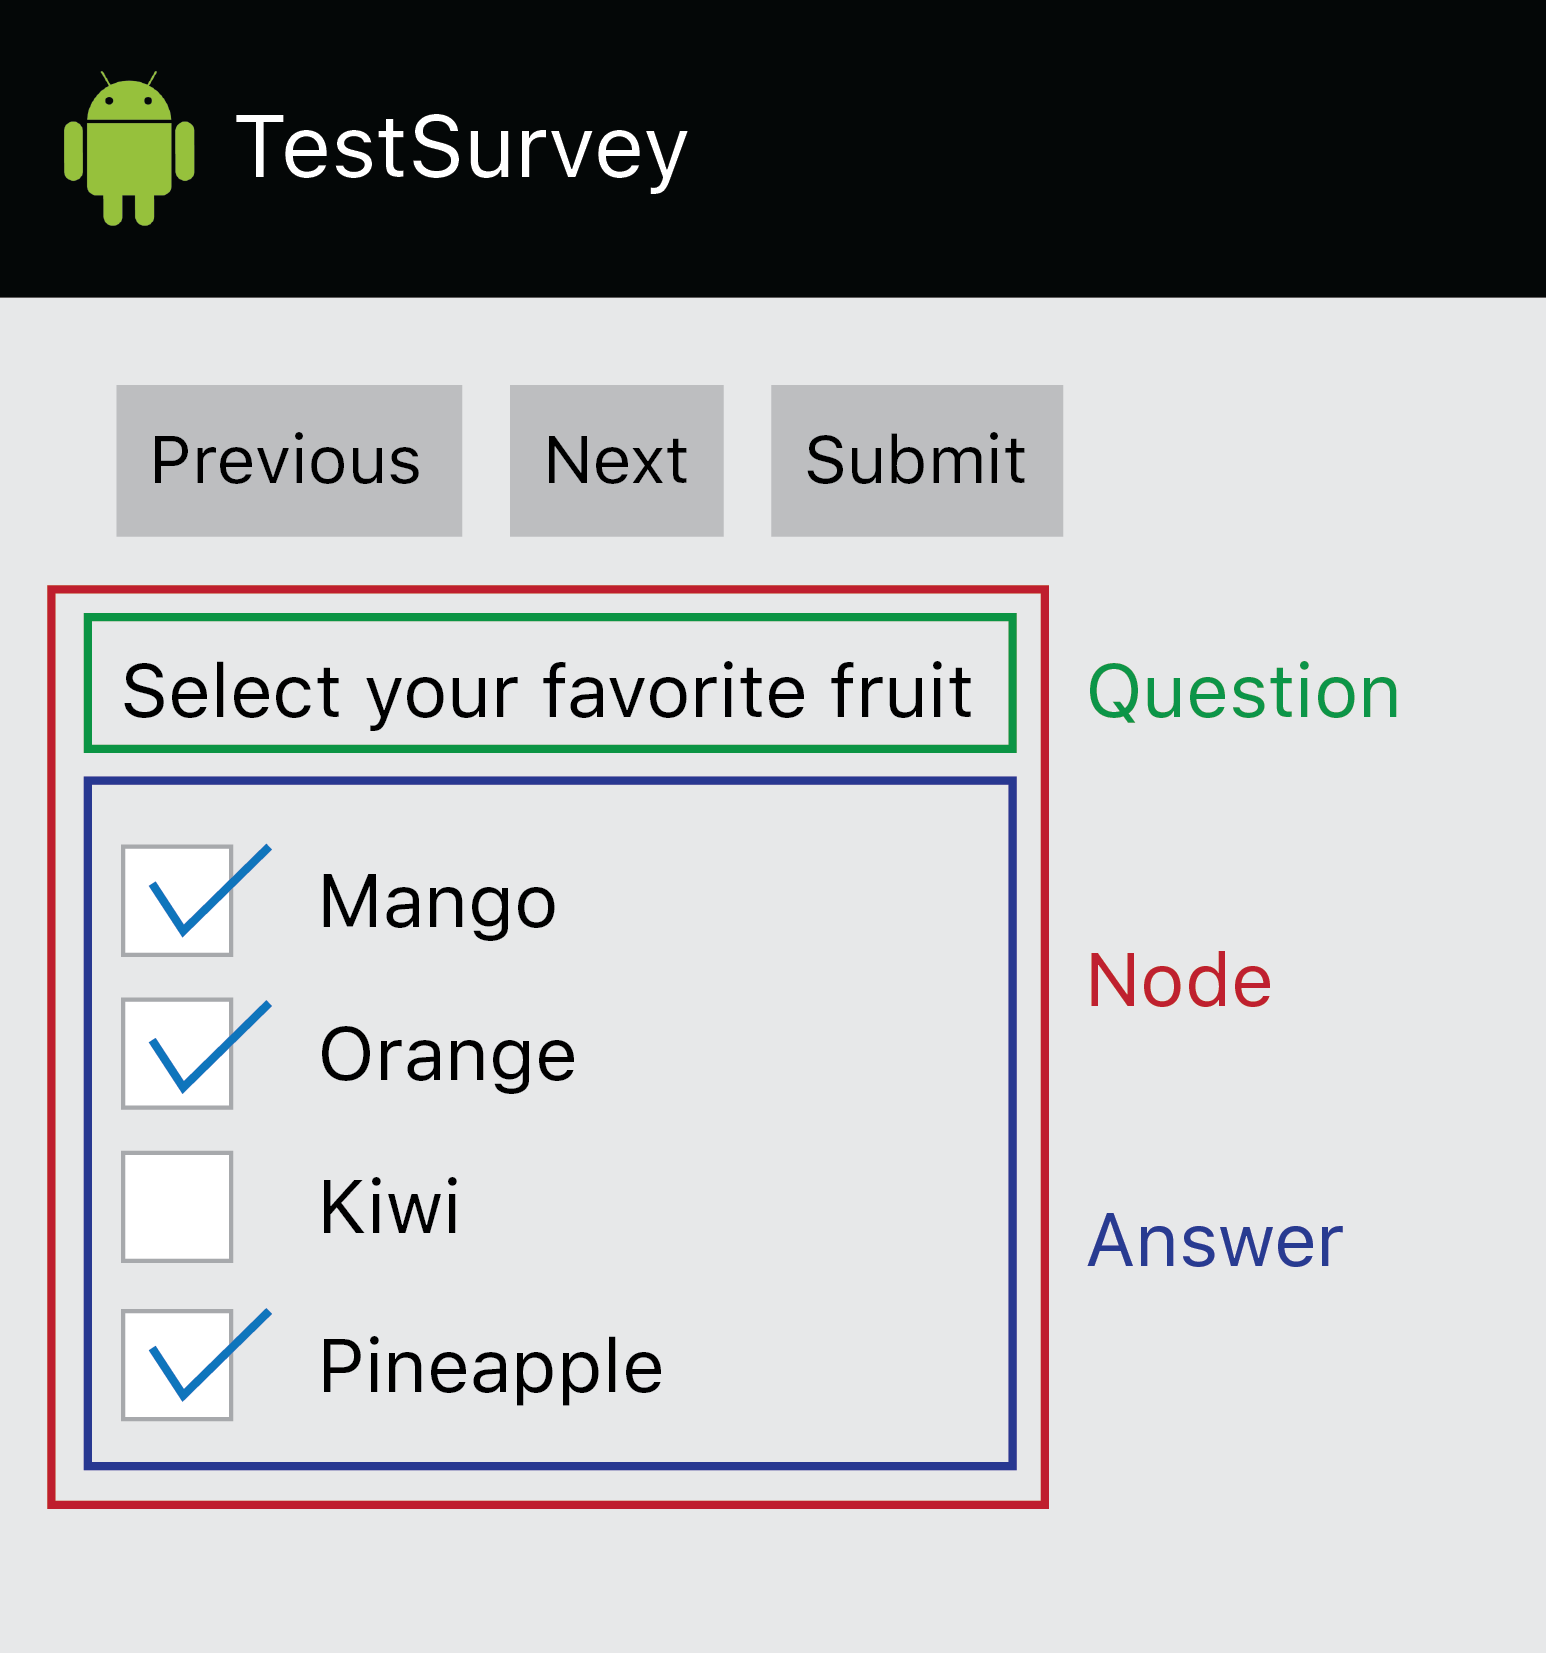
A question and an answer make up a survey node (SurveyNode). As can be seen in Figure 1, a SurveyNode contains of a Question and an Answer. A collection of survey nodes make up an entire survey. Our library can represent these nodes and render them on screen as the telemonitoring node. Custom question and answer formats can also be created by extending the classes.
How to Create a Survey?
The following question and answer types are supported in the framework.
Questions:
TextQuestion: An object of this class represents a question that consists only from text.
Answers:
TextAnswer: An object of this class represents an answer that allows users to input their answers as text.
CheckListAnswer: An object of this class represents an answer of multiple choices (check list)
RadioListAnswer: An object of this class represents an answer that allows one of many possible choices (radio buttons)
Initializing a Survey
These components can be used to build a survey as follows:
//Create Survey Object
Survey surv = new Survey();
//Create question of type text
TextItemDescription questionText = new TextItemDescription("What is your name?");
IntegerItemValue questionID = new IntegerItemValue(1);
TextQuestion q = new TextQuestion(questionText, questionID);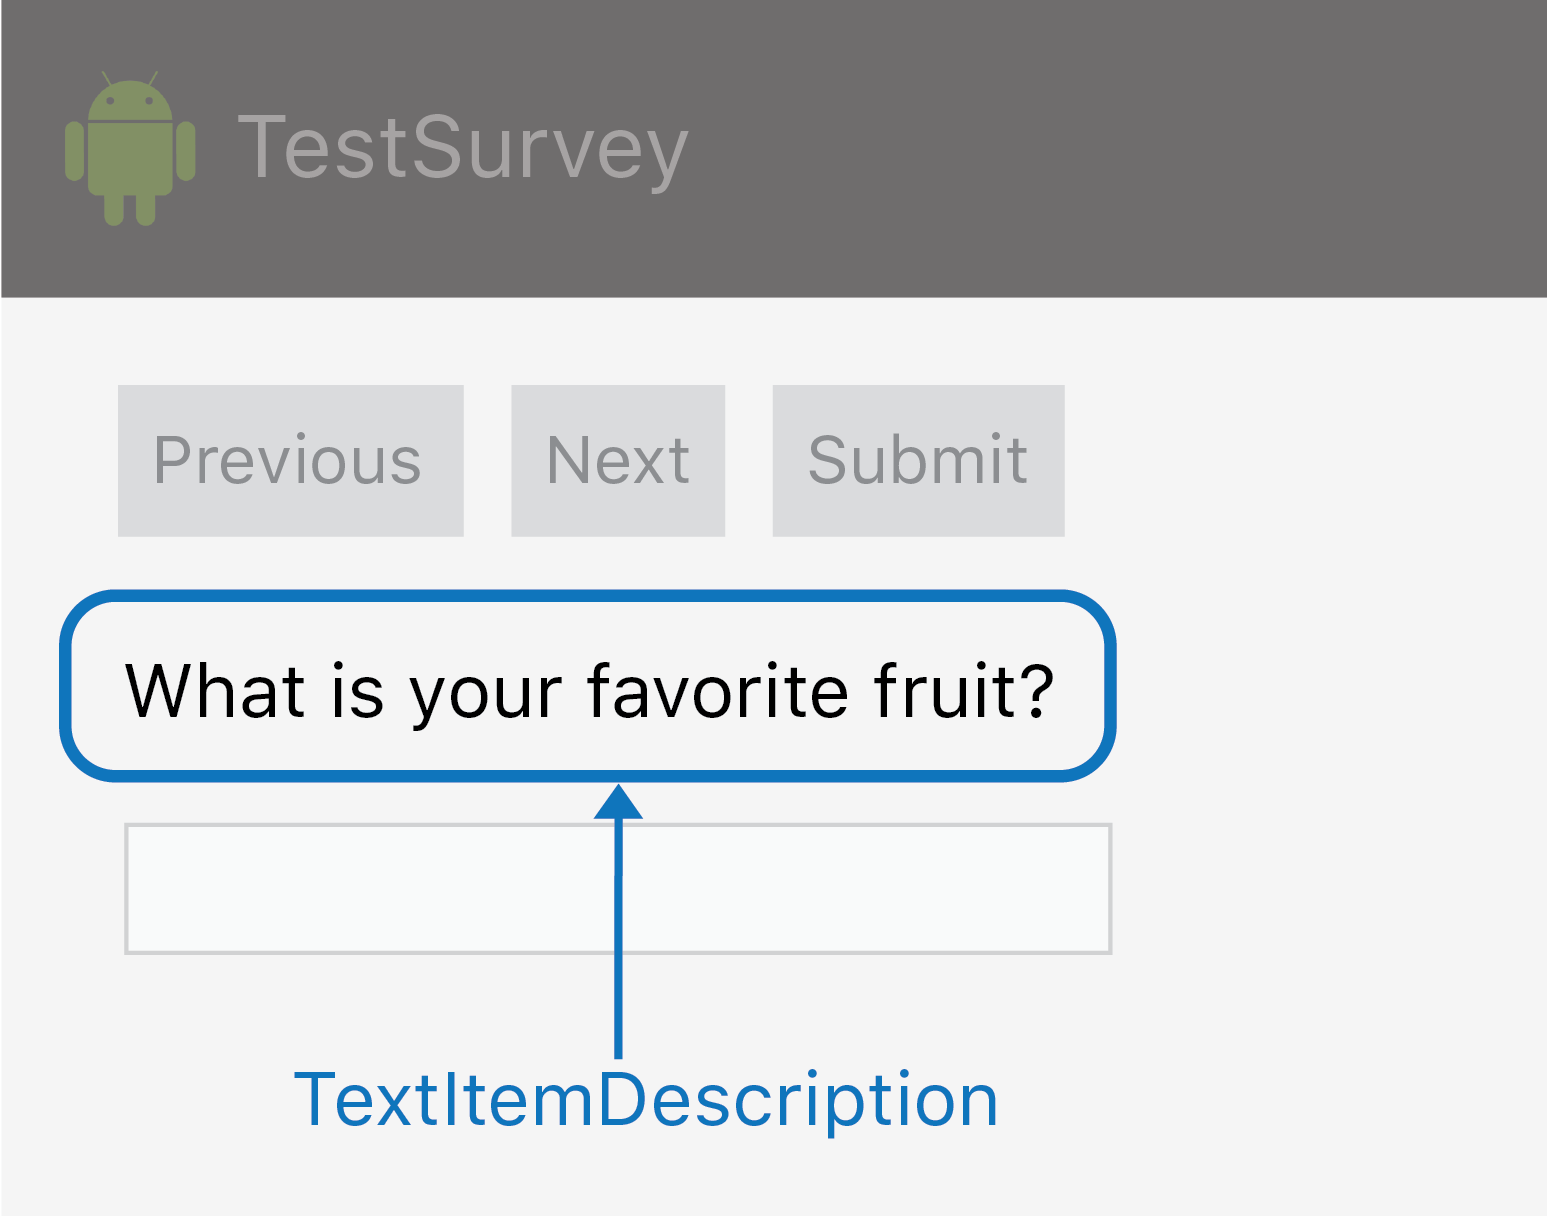
A question object always has a description and a value. The description is usually the text of the question, as shown in Figure 2. The value can be used for an ID number or other useful information.
//Create answer of type text
TextItemDescription answerDescription = new TextItemDescription("Warmup Answer");
TextItemValue answerValue = new TextItemValue("");
TextAnswer a = new TextAnswer( answerDescription, answerValue);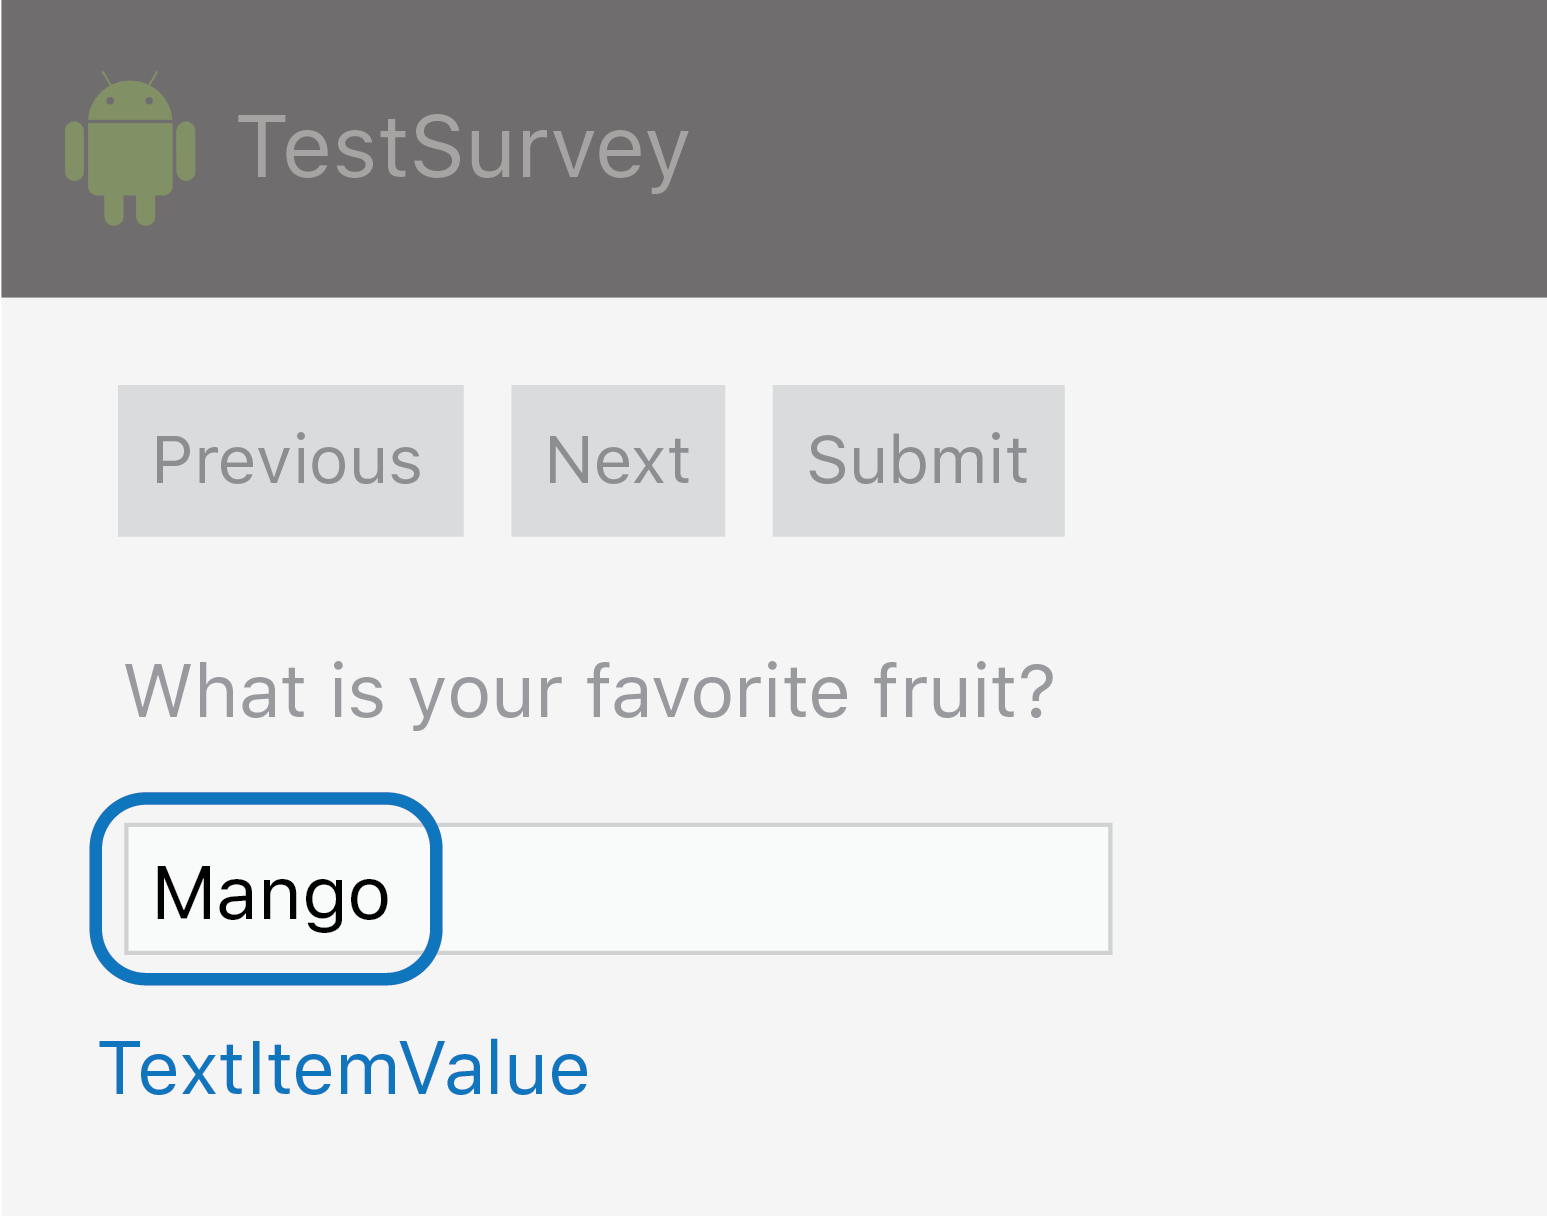
An answer object also has a description and a value. The value is usually the user inputted text and the description is just a description of the answer. This can be seen in Figure 3. For TextAnswer, the description is not shown on the screen.
//Create node with TextQuestion and TextAnswer
SurveyNode <TextQuestion, TextAnswer> textAnswerNode = new SurveyNode <TextQuestion, TextAnswer>(q, a);
//Add node to front of Survey
surv.addNode(textAnswerNode, 0);
The node is created with the question and the answer. Then it’s added to the list of nodes that the Survey contains.
Instead of TextAnswer as shown above, we can have RadioListAnswer or CheckListAnswer:
//Create TextQuestion
TextItemDescription questionText = new TextItemDescription("Choose an option below");
IntegerItemValue questionID = new IntegerItemValue(2);
TextQuestion checkListQuestion = new TextQuestion( questionText, questionID);

//Create an array of SelectableAnswers to be used for RadioList and CheckList type answers

SelectableAnswer[] answerList = new SelectableAnswer[4];

for (int i = 0; i < 4; i++){
	TextItemDescription answerText = new TextItemDescription("Text for each selectable option goes here");
        int answerID = i;
        boolean isSelected = false;
	SelectableAnswer a = new SelectableAnswer(answerText, answerID, isSelected);
	answerList[i] = a;
}
For answers that contain a list of options, we use the SelectableAnswer object to create the individual options.
TextItemDescription desc = new TextItemDescription("Answer description");

//CheckListAnswer

CheckListAnswer checkListAnswer = new CheckListAnswer(desc, answerList);
SurveyNode <TextQuestion, CheckListAnswer> checkListNode = new SurveyNode <TextQuestion, CheckListAnswer>(checkListQuestion, checkListAnswer);
surv.addNode(checkListNode, 0);

// RadioListAnswer

RadioListAnswer radioListAnswer = new RadioListAnswer(desc, answerList);
SurveyNode <TextQuestion, RadioListAnswer> radioListNode = new SurveyNode <TextQuestion, RadioListAnswer> (checkListQuestion, radioListAnswer);
surv.addNode(radioListNode, 0);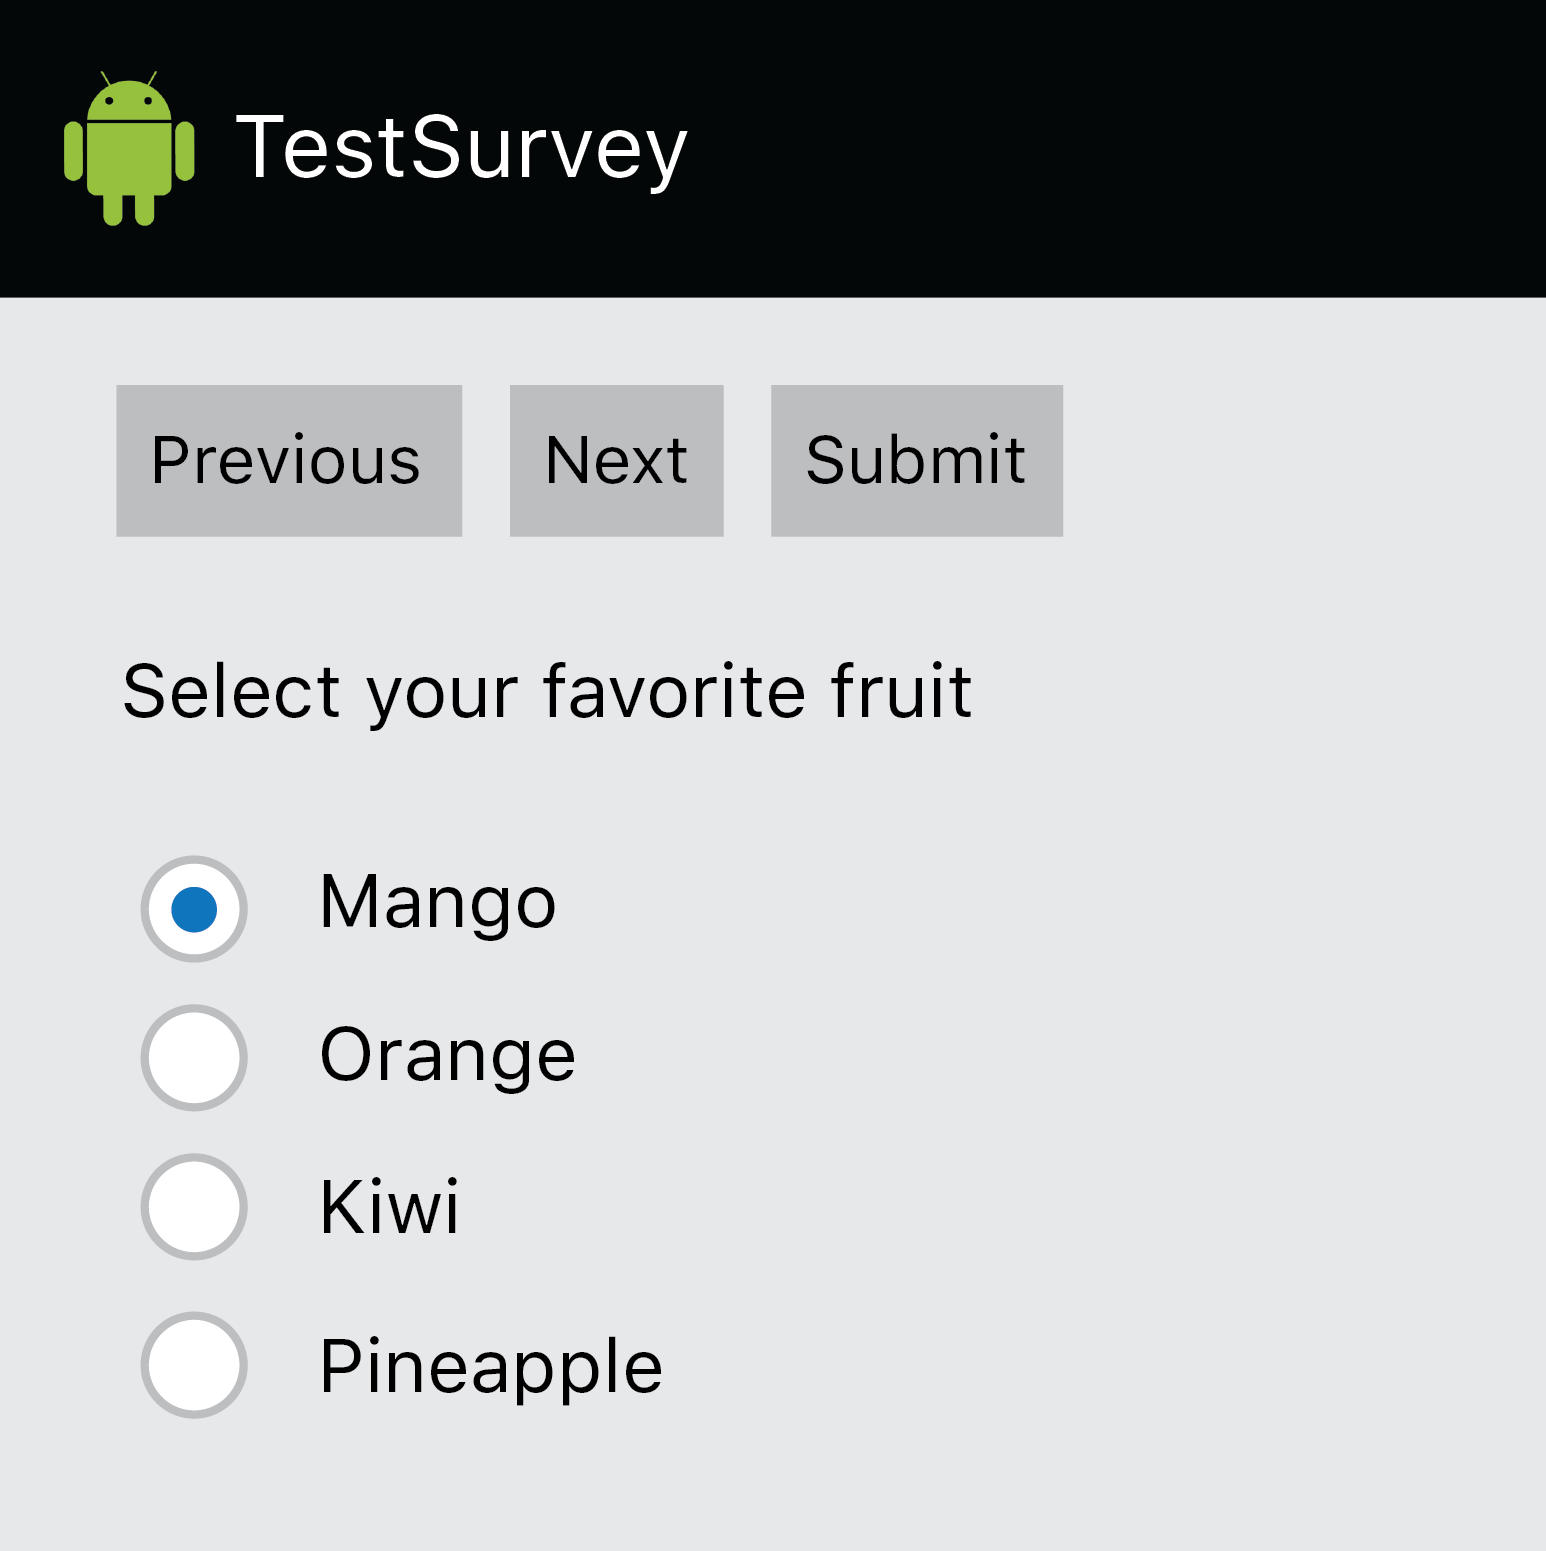
Now you can use the CheckListAnswer or RadioListAnswer to create a SurveyNode similar to the one in Figure 4. A CheckListAnswer would have a similar appearance but would allow users to select multiple answers rather than just one.
How to Render a Survey?
Creating Survey Basics
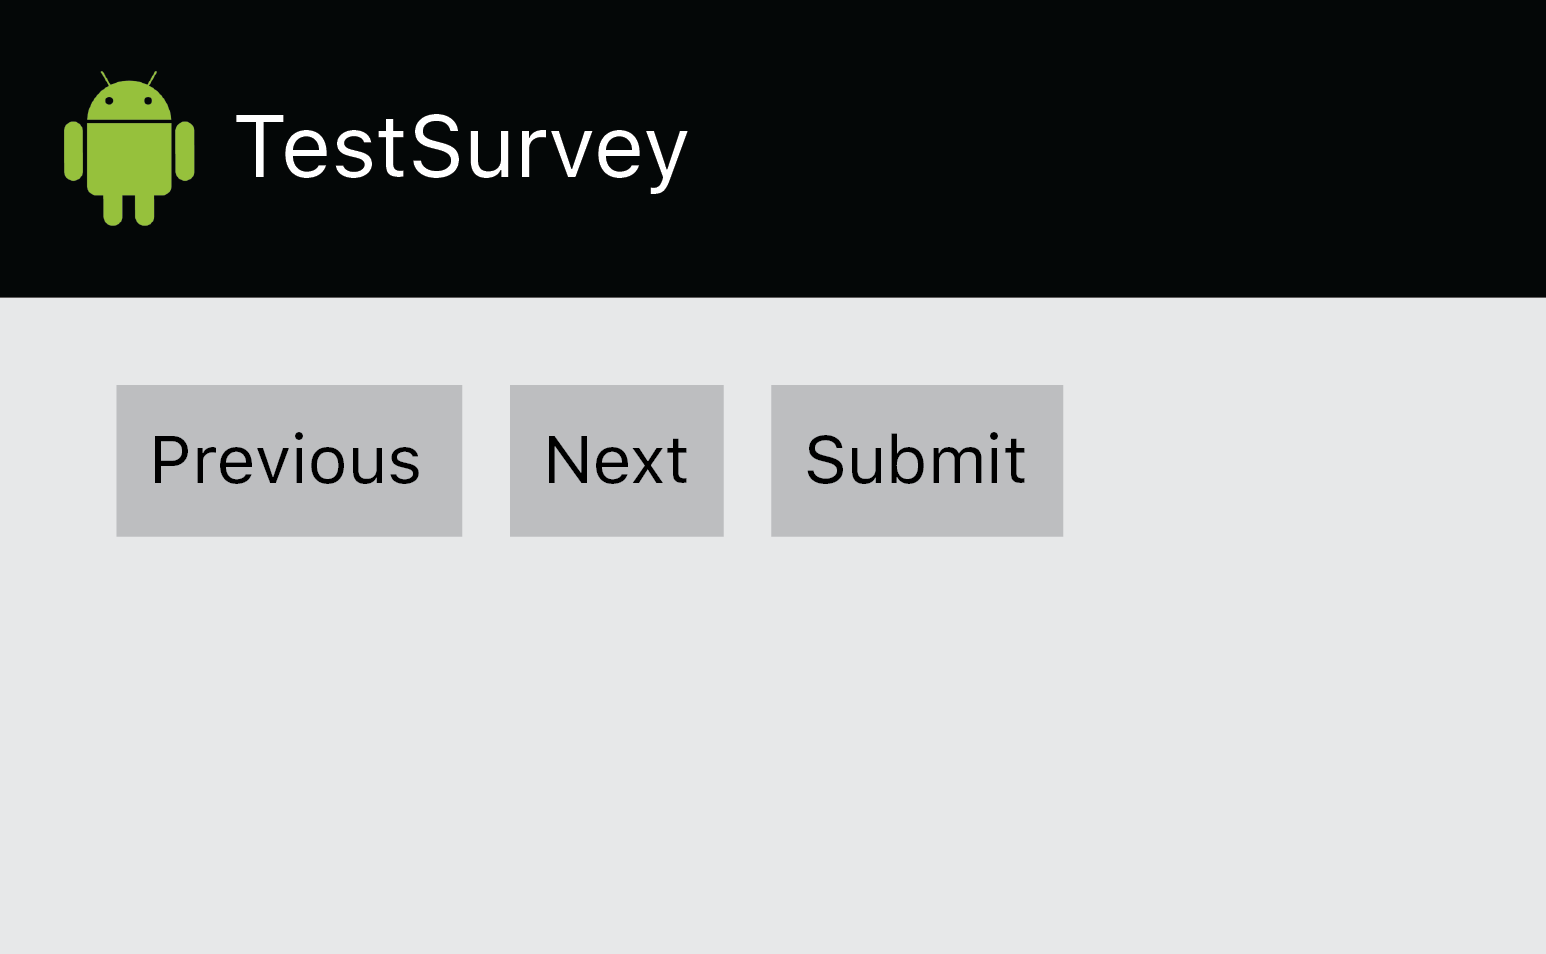
We defined a basic survey as having a next button, previous button, and submit button. You can find the basic XML to create the survey layout in Figure 5 with appropriate onClick listeners set for the buttons below.
<LinearLayout xmlns:android="http://schemas.android.com/apk/res/android"
    xmlns:tools="http://schemas.android.com/tools"
    android:layout_width="match_parent"
    android:layout_height="match_parent"
    android:orientation= "vertical"
    android:id="@+id/containerLayout"
    android:paddingBottom="@dimen/activity_vertical_margin"
    android:paddingLeft="@dimen/activity_horizontal_margin"
    android:paddingRight="@dimen/activity_horizontal_margin"
    android:paddingTop="@dimen/activity_vertical_margin"
    tools:context="edu.berkeley.ti.application.testsurvey.MainActivity" >

    <LinearLayout
        android:layout_width="match_parent"
        android:layout_height="wrap_content"
        android:orientation="horizontal">
	    <Button
	        android:id="@+id/previousButton"
	        android:layout_width="wrap_content"
	        android:layout_height="wrap_content"
	        android:text="Previous"
	        android:onClick="onPreviousClick"/>

	    <Button
	        android:id="@+id/nextButton"
	        android:layout_width="wrap_content"
	        android:layout_height="wrap_content"
	        android:text="Next"
	        android:onClick="onNextClick"/>

	    <Button
	        android:id="@+id/submitButton"
	        android:layout_width="wrap_content"
	        android:layout_height="wrap_content"
	        android:text="Submit"
	        android:onClick="onSubmitClick"/>
    </LinearLayout>
</LinearLayout>
Converting Survey to be Renderable on the Phone
To render the survey, we must first convert it to a renderable type.
SurveyRenderer survey;
/* Attempt to create a renderable SurveyRenderer using an instance of the SurveyConverter class to convert passed in survey. */
try {
        survey = new SurveyRenderer(surv, new SurveyConverter());
} catch (ClassNotFoundException e) {
        return null;
}
We must then render the initial question when the user first accesses the survey.
To do this, call the render method of the first SurveyNode in the onCreate method of your activity to get the fragment with the first question and answer. Then display that fragment with FragmentManager.
currIndex = 0;
setContentView(R.layout.activity_main);
FragmentManager fm = getSupportFragmentManager();

/* Get the fragment generated from the SurveyNode at the current position in the survey */
Fragment currentFragment = survey.getNodeAtIndex(currIndex).render();

/* Create a FragmentTransaction in which the existing fragment is replaced with the new one */
FragmentTransaction ft = fm.beginTransaction();
ft.replace(R.id.containerLayout, currentFragment);
ft.commit();
fm.executePendingTransactions();We must define the onClick methods for buttons as specified in the XML to define behavior when the user clicks on the next, previous, and submit survey buttons.
When the previous or next button is pressed, currentIndex must be incremented or decremented accordingly.
//Called when previous button is pressed
public void onPreviousClick(View v) {
        if (submitted) {
                return;
        }
        if (currIndex > 0) {
                currIndex--;
                showFragment();
        }
}

//Called when next button is pressed
public void onNextClick(View v) {
        if (submitted) {
                return;
        }
        if (currIndex < survey.getNodeListLength()-1) {
                currIndex++;
                showFragment();
        }
}
Now we can replace the current fragment with the fragment of the new index.
//Display the fragment at the current index
public void showFragment() {
        Fragment newFragment = survey.getNodeAtIndex(currIndex).render();
        if(newFragment!=null) {
                /* Replace the current fragment with the new fragment */
                FragmentTransaction ft = getSupportFragmentManager().beginTransaction();
                ft.replace(R.id.containerLayout, newFragment);
                ft.commit();
        }
}
Sending Survey Back to the Server
Before the survey (of type SurveyRenderer) is submitted, it must be converted back to a Survey. This is because an object of type Survey can be handled by the server while an object of type SurveyRenderer cannot.
public Survey convertFromSurveyRenderertoSurvey (SurveyRenderer renderable) {
	Survey s = new Survey();
	SurveyConverter converter = new SurveyConverter();
	int index = 0;
	for (SurveyNode<?,?> node : renderable) {
		try {
                        /* Convert question */
			QuestionInterface<?, ?> q = converter.convertToQuestion(node.getQuestion());
                        /* Convert answer */
			AnswerInterface<?, ?> a = converter.convertToAnswer(node.getAnswer());
                        /* Add the converted node to survey */
			s.addNode(new SurveyNode<QuestionInterface<?, ?>, AnswerInterface<?, ?>>(q, a), index);
			index++;
		} catch (ClassNotFoundException e) {
			return null;
		}
	}
	return s;
}
//Called when submit button is pressed
public void onSubmitClick(View v) {
        if (submitted) {
                return;
        }
        removeAllFragments();
        submitted = true;
        Survey completed = convertFromSurveyRenderertoSurvey(survey);
        /* Add your code to send completed survey to server here */
}
Advanced: How to Create Custom Questions and Answers?
Implementing New Question and Answer Types
- Create your new class that implements the QuestionInterface or AnswerInterface in the Core library
- Create a corresponding renderer class that implements QuestionRendererInterface or AnswerRendererInterface in the Client library
- Create a corresponding class in the Client library that extends Fragment and override the onCreateView method for custom display of your Question/Answer type
- Extend the SurveyConverter class to add conversions between your class that implements QuestionInterface/AnswerInterface and your class that implements QuestionRendererInterface/AnswerRendererInterface. Pass in an instance of your custom converter class when creating the Survey object.
Running Example
(TODO: complete)